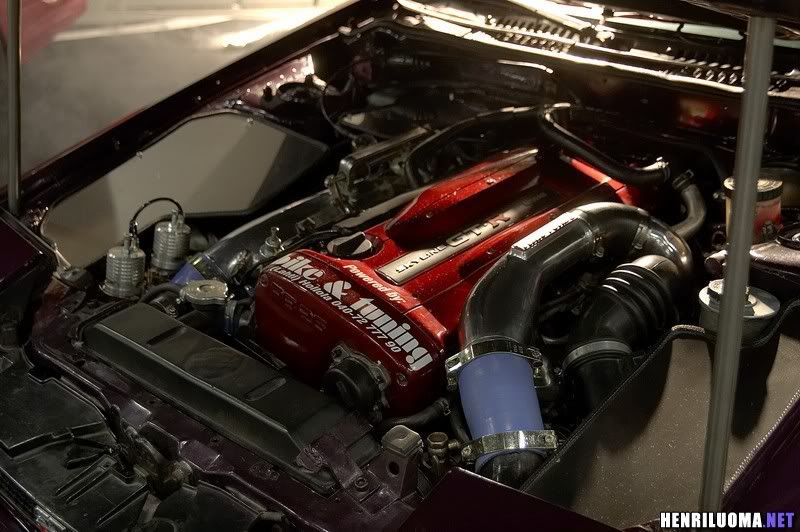
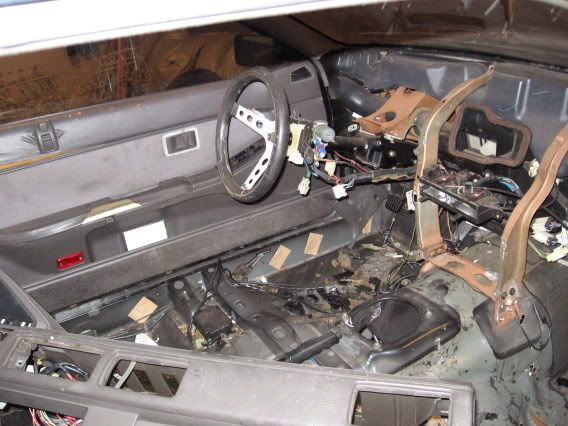
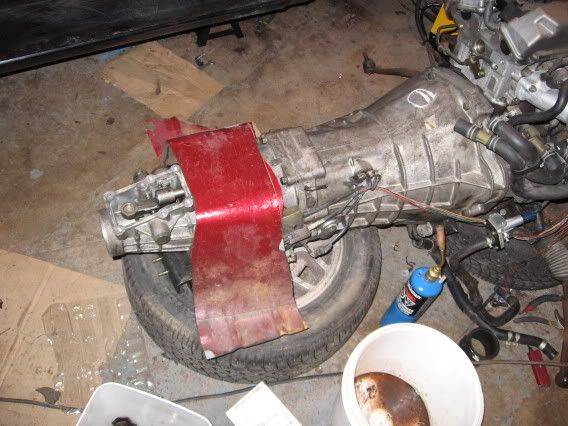
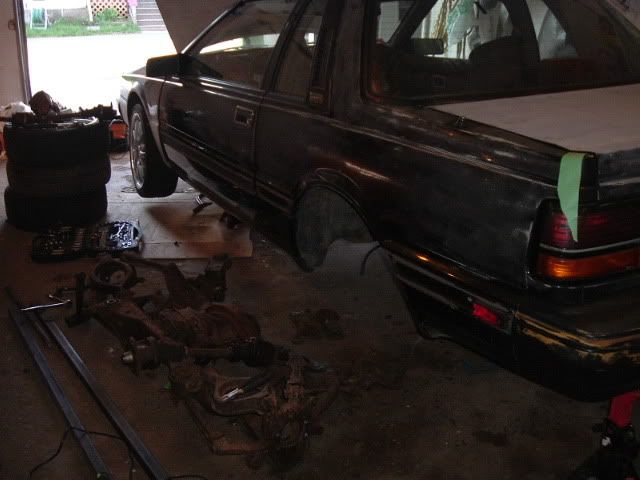
So it began (Well it's been started for a couple weeks now)
I figured i'd post a few updates as some people may be interested.
The flow of jobs goes as follows.
Strip the front end
Remove CA20e
Prep engine bay
Remove EFI harness
Drop front suspension and crossmember
Bolt RB25 to new mounts
Test fit new 240sx struts and crossmember
Attach RB to 240sx crossmember
Lift car on top of engine/tranny
Lower car
Bolt on crossmember
Measure driveshaft & call drivetrain shop
WIRING!!!!!
Shifter locating
Fuel lines
Install walbro
Radiator (240) install
Install cooling fans
Route intercooler (FMIC) piping
Finish off any loose ends (clean up wiring)
START (hopefully) engine
Connect driveshaft and top off tranny fluid.
Have fun.
Wiring is really going to be a nightmare, so far I know I need to be worried about connecting the: Fuel pump relay, start/on signal. I also have a few connectors on the RB which are "Unknown" and my wiring diagrams lack in the proper info to solve it. I believe they were for the overdrive sensor, brake fluid level, and LSD sensor.. I'll double check though.
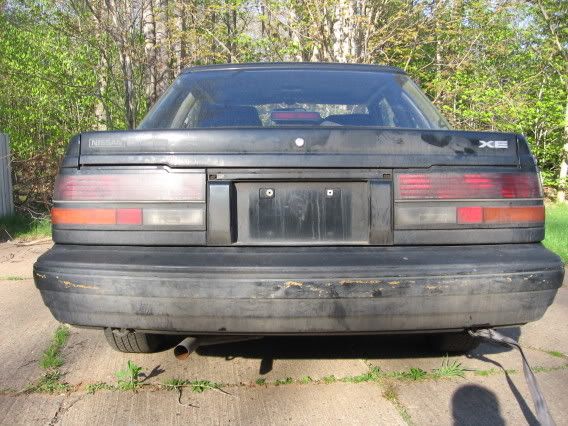
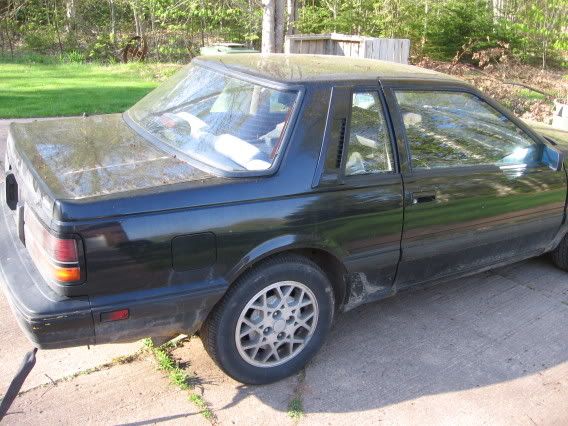
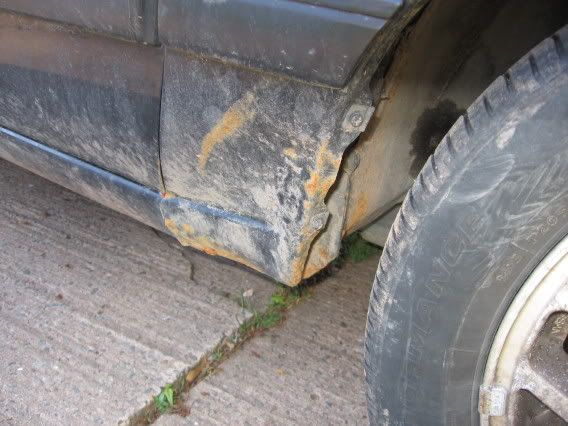
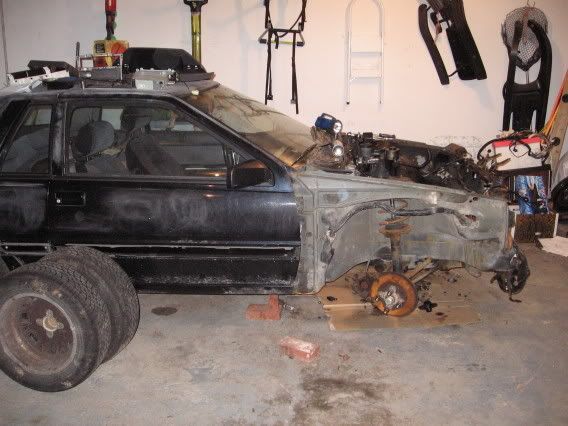
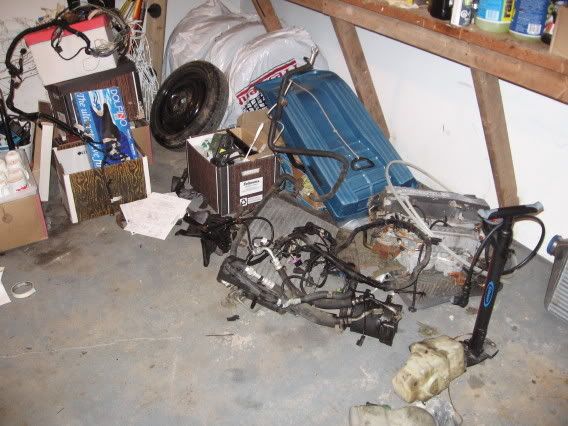
Here are the pics!

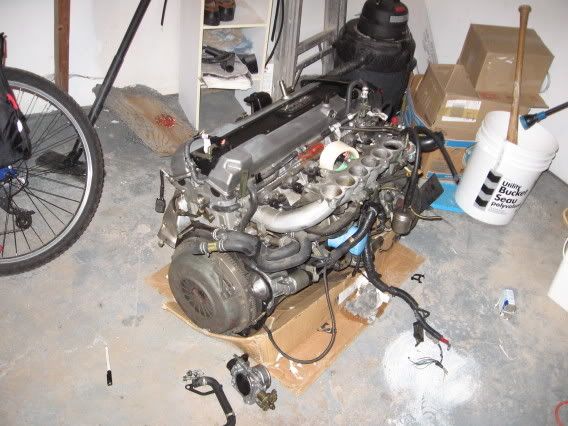
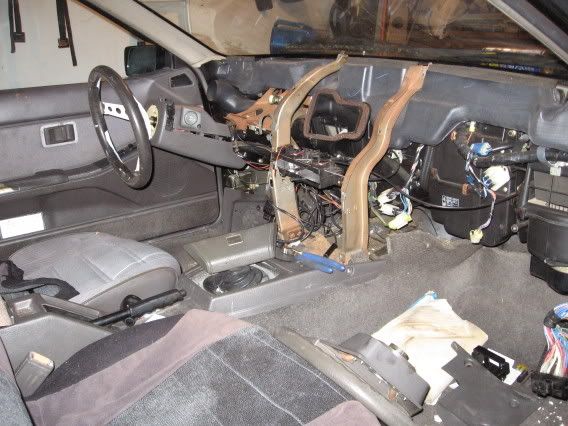
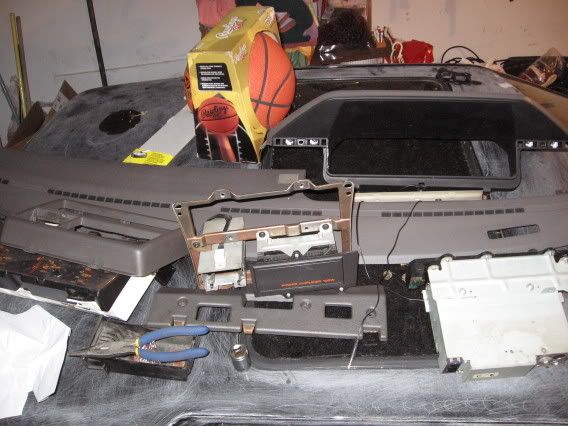
Browse › Builds & Media ›Build projects
RB25det, June 28th deadline - no sleep until completion. then beer.
I hope your car doesn't stay on bricks too long..
LOL, no about a week ago I went out and bought axle stands.
Yeah, that was pretty ghetto rigged there.
We WERE supposed to be building this project in our 'performance shop' but its full with other top priority cars, so I had to start this at my home, where I lack in 'proper tools'....
thats gonna be a sweet build. please keep us updated
Looks like a big project... i hope the cancer isnt too advanced...
Remember double the amount of time u expect it will take... then add a few months :p
Best of luck... and keep us informed!
Awesome, keep us updated
oldschoolsilviai measured this conversion up before deciding on the v8 turbo. no room at the front mate what so ever
Awesome, keep us updated
good job though!! will be a weapon!!
Yeah the front is a little tight but it fits. This a 26dett in an S12 for referance.
I'm actually more concerned about the turbo clearance on the frame rail, and where I will have to locate the downpipe AROUND the steering column.
-Dan
First major problem encountered:
The transmission is both too large, and the mounts are in an undesired position. What does this mean? I am going to basically grind/scape/destroy the S12 mounts off the propeller tunnel and use donor 240 mounts (which were brutally hacked out of a parts car) which will be bolted to the actual mount, then tack welded in place, and reinforced with welds and bracing. This will give the desired bolt spread as well as width, and placement.
We also began the S13 rear suspension conversion today and dropped the S12 subframe. Twas good fun.
Pics to follow.
-Dan
I was about to say that I want to see the pics of the blown r180 but I see your already taking care of it. Would you be able to post some more pics of your progress?
Updatey demanded. LOL
Then an update thou shalt have.
I hit some major roadblocks with chassis work. I am by no means a body man, and barely have 3 months of mig experience under my belt (without shielding gas).. I will let the pictures do the talking.
I am doing a toad conversion on the front end using grand prix headlights. In this picture it shows how I am attempting to blend the headlight panels into the hood.
The piece of 240sx transmission tunnel we need to use. The aftermarket mounts we have dont even come close to fitting the 200sx bolt holes. AND the 200sx tunnel is too narrow (mounts are too fat).. More chassis modifications.
I have some pictures of the test fit, but nothing very recent.. We have to lift the car into the air and put it ONTO the engine, but that there are no rear wheels we cant really move the car around.
All in all VERY TIME CONSUMING!!
Holy cow. You're working your ass off. That's a sweet build man, my best of luck to you.
Damn thats looking pretty good. I have one suggestion though, send those donor parts to be bead blasted and powder coated. keep udating thoughm this is good stuff.
Good going and good luck!
Jokes801tmc
Damn thats looking pretty good. I have one suggestion though, send those donor parts to be bead blasted and powder coated. keep udating thoughm this is good stuff.
Way ahead of you. My uncle owns a powdercoating company not far from my home, and he has an in-house sandblaster (good enough). The donor car was very very very rusty. I am having all the 240sx springs powdercoated, and the suspension bits. However, the crossmember is already in place and I am not gonna fuck with it.
Nismo 180sx struts are on the way!!!
How can I say I hate you? LOL That is some serious work. As for the intake thingy for the RB25... yeah, I looked it up for the RB20... I was looking at another $800-ish. I still have ideas for the future building. And if I had the luxury of time/money that you apparently seem to have, I would do a better build. But seeing that my S12 is my daily and I want this thing finished by HIN, Sept. 30th, I have to settle with some things left undone and to be finished in the future.
Draconis
How can I say I hate you? LOL That is some serious work. As for the intake thingy for the RB25... yeah, I looked it up for the RB20... I was looking at another $800-ish. I still have ideas for the future building. And if I had the luxury of time/money that you apparently seem to have, I would do a better build. But seeing that my S12 is my daily and I want this thing finished by HIN, Sept. 30th, I have to settle with some things left undone and to be finished in the future.
You shouldnt have too much trouble. Your tranny will actually FIT the confines of the 200sx tunnel, and you can use the R180 (I just didnt want to)..
Hints for wiring:
a) Use the 200sx lower engine harness
b)locate the oil pressure signal wire in the cluster. Wire it to the ecu
c)locate the 200sx (chassis side) clip that contains the fuel pump relay signal.
d)you will need to switch (via the ignition switch) the ECCS relay and the Ignition relay. The ignition relay charges more than just the coilpacks, read the diagrams.
e)If possible, upgrade to a 240 radiator (or better). You will not be able to fit the clutch fan, so find some alternatives.
f)Fitting in a downpipe around the steering column is hell, get a pro to do it.
g)You may have to cut the hood bracing to clear the throttle body
h)Oil filters are the same as the KA24
i)Check the water pump for corrosion (internally).
As for money, I wouldnt really say I have alot of it. Moreso that I save up for key components which I think will vastly improve this project's all around performance. Almost no money is being spent on looks or interior (It will have no interior).
Today I realized (horribly) that the 240sx front shocks are not going to fit. The springs are too large of a diameter. I do have Nismo 180sx struts on the way, but I believe that I will also need to order a set of Ground control coilovers to adapt to them.. More time/money into the mixing pot.
-Dan
RB25sx - SLPR
You shouldnt have too much trouble. Your tranny will actually FIT the confines of the 200sx tunnel, and you can use the R180 (I just didnt want to)..
I have the tranny and everything already in there. And I'm still using the R200.
RB25sx - SLPR
Hints for wiring:
a) Use the 200sx lower engine harness
b)locate the oil pressure signal wire in the cluster. Wire it to the ecu
c)locate the 200sx (chassis side) clip that contains the fuel pump relay signal.
d)you will need to switch (via the ignition switch) the ECCS relay and the Ignition relay. The ignition relay charges more than just the coilpacks, read the diagrams.
Randy does the wiring. He's getting together with a guy who does RB swaps in S13s and S14s all day long and work on the S12/RB wiring. But I will definately pass on your advice.
RB25sx - SLPR
e)If possible, upgrade to a 240 radiator (or better). You will not be able to fit the clutch fan, so find some alternatives.
f)Fitting in a downpipe around the steering column is hell, get a pro to do it.
g)You may have to cut the hood bracing to clear the throttle body
h)Oil filters are the same as the KA24
i)Check the water pump for corrosion (internally).
e: I am using the R32 radiator. I got the a R32 front clip. And I am using electric pusher fans.
f: downpipe and all... well everything from the turbo back will be custom per Randy's specs.
g: I am able to close the hood without any issues. The hood remains intact.
h: oil filters... Using the Z32 turbo/R32 one... same part number.
i: my water pump was in excellent condition, but I did buy one a while ago anyway.
http://club-s12.org/v3/index.php?topic=14579
Soon to come after will be a GT28R... the S15 BB turbo, bigger fuel injectors and SAFC II or the new replacement for it... forgot the name of it.
I like the steering wheel, BIG dish
WOOT! No matter how difficult this swap gets, I really like seeing encouraging things.. JUST by chance, almost the entire lower engine harness is a direct fit from ca20 -->Rb25 this means:
-Reverse light clip PLUGS in
-Neutral safety switch PLUGS IN
-Oil pressure sensor PLUGS in
-Starter and relay PLUGGED in
The only thing there arent accomodations for are the two knock sensors and the speed sensor, I am going to integrate these into the main EFI harness and route them along to the ECU as that is where they are going (non-chassis related).
Sweeeeet.
RB25sx - SLPRWOOT! No matter how difficult this swap gets, I really like seeing encouraging things.. JUST by chance, almost the entire lower engine harness is a direct fit from ca20 -->Rb25 this means:
-Reverse light clip PLUGS in
-Neutral safety switch PLUGS IN
-Oil pressure sensor PLUGS in
-Starter and relay PLUGGED in
The only thing there arent accomodations for are the two knock sensors and the speed sensor, I am going to integrate these into the main EFI harness and route them along to the ECU as that is where they are going (non-chassis related).
Sweeeeet.
sweet!!
awesome man...when your done with yours you can start on mine
Any news?
[quote name='RB25sx - SLPR' date='Jun 13 2006, 08:34 PM' post='87768']
So it began (Well it's been started for a couple weeks now)
I figured i'd post a few updates as some people may be interested.
The flow of jobs goes as follows.
Strip the front end
Remove CA20e
Prep engine bay
Remove EFI harness
Drop front suspension and crossmember
Bolt RB25 to new mounts
Test fit new 240sx struts and crossmember
Attach RB to 240sx crossmember
Lift car on top of engine/tranny
Lower car
Bolt on crossmember
Measure driveshaft & call drivetrain shop
WIRING!!!!!
Shifter locating
Fuel lines
Install walbro
Radiator (240) install
Install cooling fans
Route intercooler (FMIC) piping
Finish off any loose ends (clean up wiring)
START (hopefully) engine
Connect driveshaft and top off tranny fluid.
Have fun.
Wiring is really going to be a nightmare, so far I know I need to be worried about connecting the: Fuel pump relay, start/on signal. I also have a few connectors on the RB which are "Unknown" and my wiring diagrams lack in the proper info to solve it. I believe they were for the overdrive sensor, brake fluid level, and LSD sensor.. I'll double check though.
Here are the pics!
good luck on it if you need any help pm me and ill be glad to help
Any news?
^^^^ X2!
all i can say is, i'm fvcking jealous....i wish i had that much time/money/patience/tools/knowledge/etc
the pics?
I am now at school so there is no real progress being made currently. The subframe was finalized, and the shock towers were 'temporarily' welded so as the car could be moved on 4 wheels. Also, a gaping hole was gouged out of the transmission tunnel so as to let the massive tranny fit.
There are some major issues with the front suspension, namely the T/C rods (240 vs 200 are completely different) and the width of the steerting rack/rie rods. I will have it all sorted though with some TEIN adjustable T/C rods and custom fabbing the 240sx t/c brackets into place. As for the steering rack, I may have to adapt either the 240 rack, or find a combination of 200sx and 240sx rods that will work.
Keep an eye out for the spring, we'll be ordering up some cusco coilovers.
-Dan
Getting geared up for the summer season of wrenching!
On their way to my doorstep currently are:
S13/14 adjustable tension rods
5 bolt s13 hubs
Fully adjustable S13 tie rod set
Stance GR+ coilovers bitcheezzzz!
This may be more of a luxury, but if I can, i'll be forking over for these FTD flik's wrapped in TOYO T1-R rubber._angle_zoom.jpg)
MORE PICS IN MAY!
-Dan
nice work so far, going to be killer when done!
I would look into Bings Tension rods. They should be coming into the market very soon.
Awesome work man Im definitly looking foreward to more updates
Nice let me know if you ever need any small parts from Japan.
Hey any updates on this build?
i was thinking of doing an rb30det with the skyline head in mine but thaught id be safer going sr20det
good luck man
wow, thats crazy. the notch youre using is pretty rough, but it looks like you got the skills to repair it. very cool project
Pics tonight!!
Front suspension is completely assembled, totalled the cost of the parts and not including the brakes and wheels, its 1800$ Canadian..
Front and rear brakes have been powdercoated ferrari red.
14mm wheel spacers.
Rear strut towers have been completely chopped with a jig system installed to line up the rear coilovers.
Steering column is being adapted to work.
Looking for a 1995/1996 J30 axle and diff (VLSD!).
Now, the challenge comes of finding seats that will fit, so far i've tried: 1991 prelude si seats, 1995 mitsubishi eclipse seats, S13 seats, and S14 seats.. None of them truly fit well, and since im 6'3" they MUST sit low....
-Dan
Im excited Cant wait til your done... and you make a video.... I want to see how bad ass an RB25 is in an s12
I had s13 seats in my car, just used the factory sliders from the S12 bolted on with brackets and they fit like a charm. Sat just as low if not lower than the stock seats.....I recently took them out, and put new stock seats in because the S13 seats are sooo uncomfortable plus they are ugly lol.
you shouldnt have any issues with leg room in a s12... the seats move back into the friggen taillights. Premo is like 6'5 and he fits in a s12. i think the stock seats are the best in terms of comfort and fit. they keep ya pretty low too. you could always try cutting into the seat supports to bring them down a little or even remove some of the material inside the seat.. maybe try different internal springs till it sits just right. use your head with this, you have the skills to make anything happen
UPDATES! I dont have picture of my front suspension, but I totalled the cost for it alone, and it's in the area of 1800$.. I shat my pants after I counted...
Here we go:
Properly toed wheels thanks to fully adjustable S13 tie rods, bolted to an S12 steering rack which sits atop an S13 crossmember. Wheels are RTX unknowns, 17x7 with a fwd offset. I've purchased 1/2 wheel spacers to compensate.
Old VS new, S12 tie rod on left, Brand new BING's fully adjustable tie rod on right, picture taken without the tie rod end.
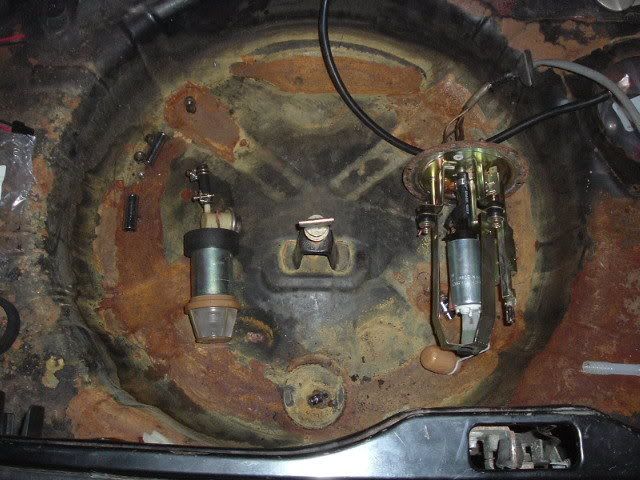
Fuel pumps. Walbro is sitting inside cage (not tied down yet), S12 is on left. As you can see, the trunk had water sitting in it and has lots of surface rust.. Nothing a brillo pad + tremclad cant fix.
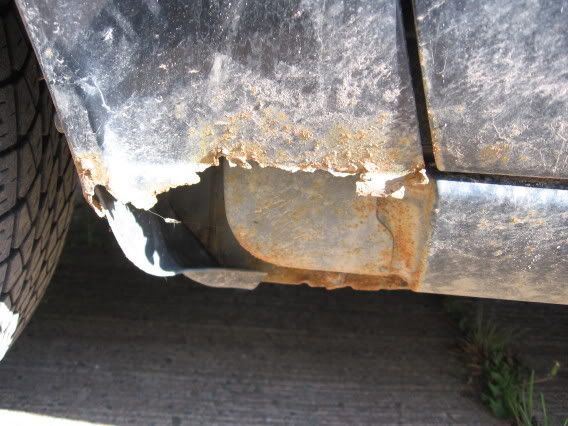
Ah yes the EPIC hole in the transmission tunnel. Basically what I am doing is welding in a piece of S13 tunnel to accomodate the transmission. This is partly due to how close I am mouting it to the firewall.
Me welding the rusty spots on the frame with patches.
To position the rear shocks, we had to make reference to the factory mounting locations. Essentially we built a jig which could be placed on the shocktower. It's tip would reference to very top and dead center of where the coilover need sit. We used an S13 with factory mounting locations: it was conveniently located right next to the S12.
The car.
It's neighbour.
Many of these will be consumed.
Subframe has been welded (professionally) and painted tremclad blue. It's nice looking now. E-brake assemblies are together (but confusing as all hell) and the rear end is going together tonight. I have also finished 75% of the rear shock towers. They will need professional metal work/welding to be strong enough to handle the abuse I will throw at it.
Waiting on a set of stainless steel brake lines for the fronts and performance brake pads (HAWK hps for a '93 maxima).
ROLLING CHASSIS FTW!!!!
Man, this is hard stuff...
-Dan
UPDATE!
July, 22, 2007
Here is where it stands:


Sorry 56K!
-Dan
looks good, still question the front lights tho.
Please tell me those thermo's are designed to be the push type!?!?
very impressed with the subframe work, rear coilovers would make life all that much easier!
gadget1382looks good, still question the front lights tho.
Please tell me those thermo's are designed to be the push type!?!?
very impressed with the subframe work, rear coilovers would make life all that much easier!
Thanks for the response!
Those headlights are from a 1990 Mazda 626, they arent sealed beam like the grand prix ones, which was a huuuuge bonus (HID anyone?). How do you mean you 'question' them? The brackets are not finished yet, and with the bumper cover on it should look OK.
Yes, I swapped the fans such that they would be pushers. There is a bit of rubbing but it should eventually 'wear away'.
I forgot to mention that mounted within that subframe is a 1994 Infiniti J30 VLSD with corresponding 5 bolt axles.
El drifto!
-Dan
This is truly amazing respect from the a fellow s12 owner all the way from the u.k.
question, as in i'm not sold on them yet... they look different, but i'm not sure if they look good or not
The comment about the thermo's was that if they are curved blades / fin's they will not work anywhere near as good if you just wired them so they go in reverse. The fan is optimised to go in one direction only.
But if you have done it properly, hats off! i just am looking out for potential over heating issues, as i've experienced them ... and it aint pretty.