Browse › Marketplace ›Vendors

Silhouette Autosports adjustable rear control arm cutting guide

Started by IggyEGuana · Feb 26, 2014 · 18postsSMF 2010–26

IggyEGuanaFeb 26, 2014, 12:38 am · #1

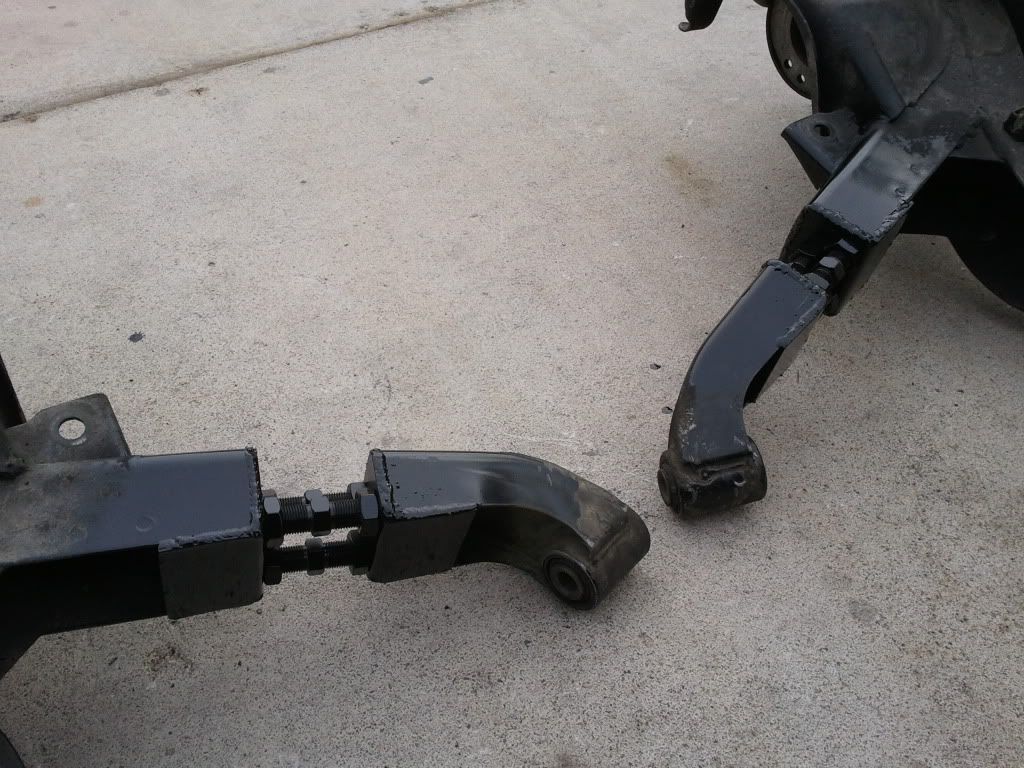
This is a photo guide for how to measure and cut your rear control arms when installing Silhouette Autosports adjustment brackets. This guide also serves to help DIYers who are doing this mod themselves.

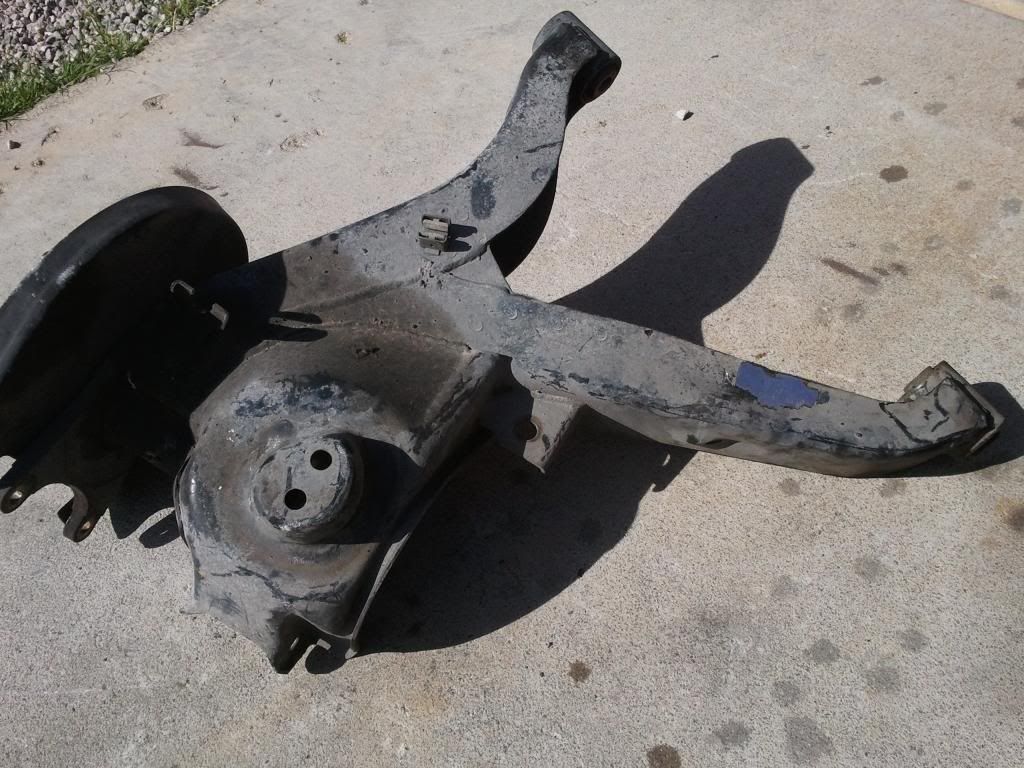
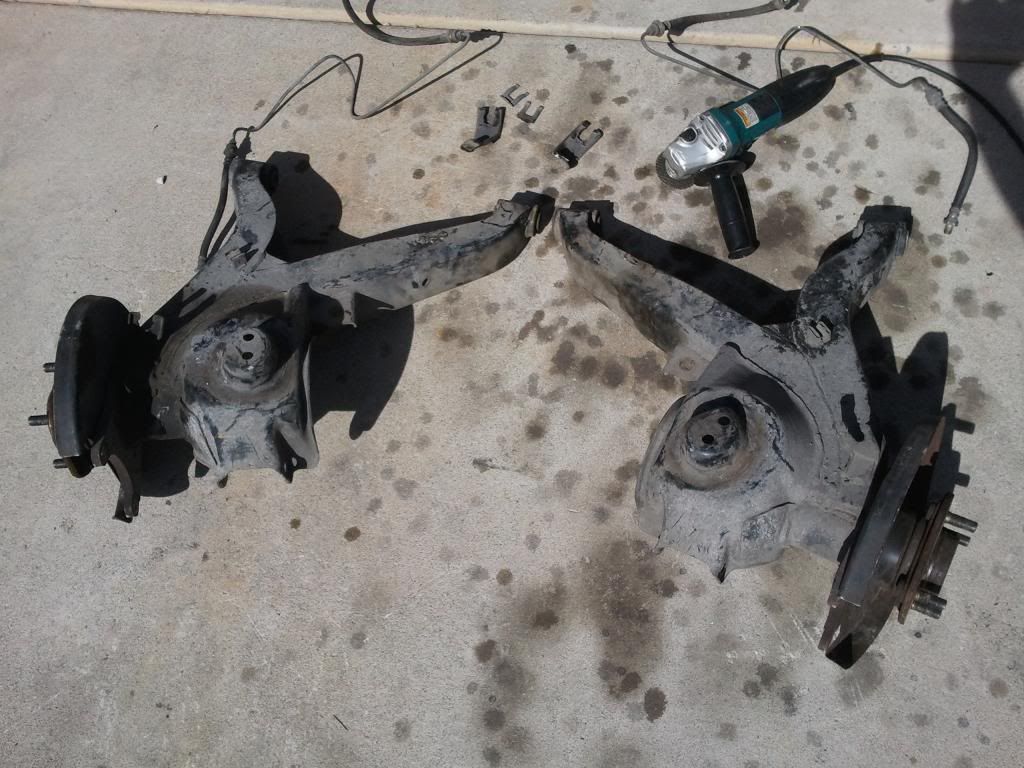
Rear control arms with axles, brake calipers, brake rotors, brake lines, and brake line bracket removed. Z31 arms pictured but S12 arms are the same process.
posted image

Driver's (left) side control arm
posted image

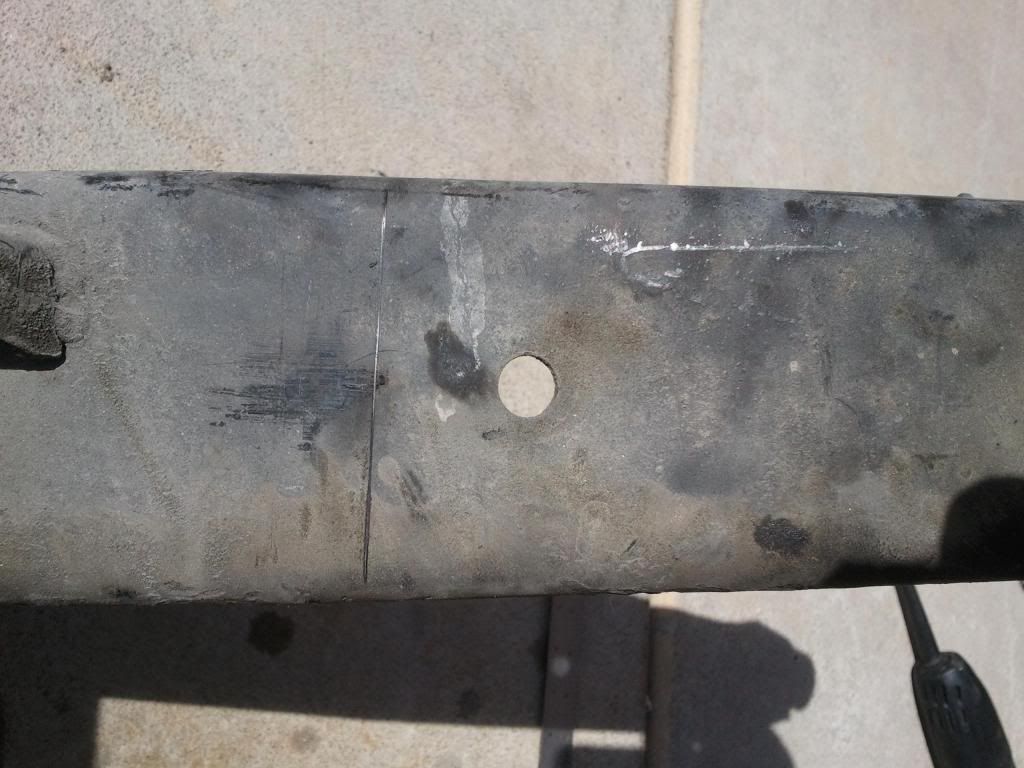
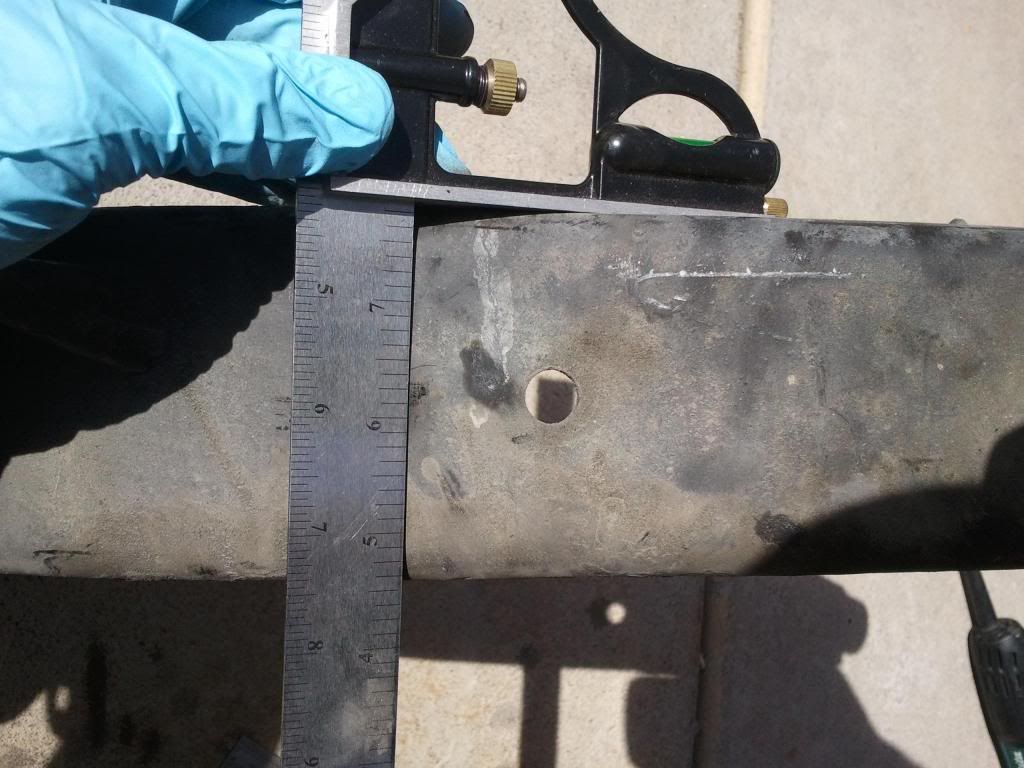
Make the first mark. Using a 90 degree square guide scribe a line near the stamped hole as pictured. The bushing is to the right and the hub is to the left. The guide is 1 1/16"(27mm) to 1 1/8"(29mm) from the stamped hole. The guide is placed on the top surface of the control arm so that the mark is made 90 degrees from the angle of the top surface.
posted image

First mark is made.
posted image

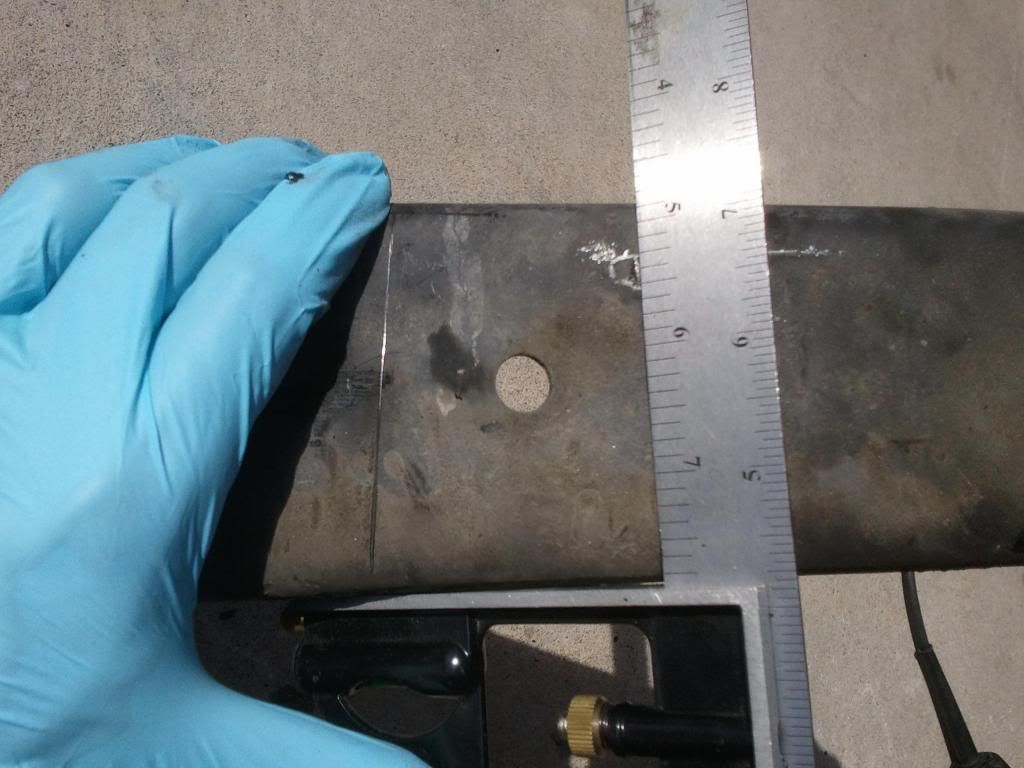
Make the second mark. Distance between the two lines at the top surface of the control arm is 2 inches(51mm). The guide is placed on the bottom surface of the control arm so that the mark is made 90 degrees from the bottom surface.
posted image

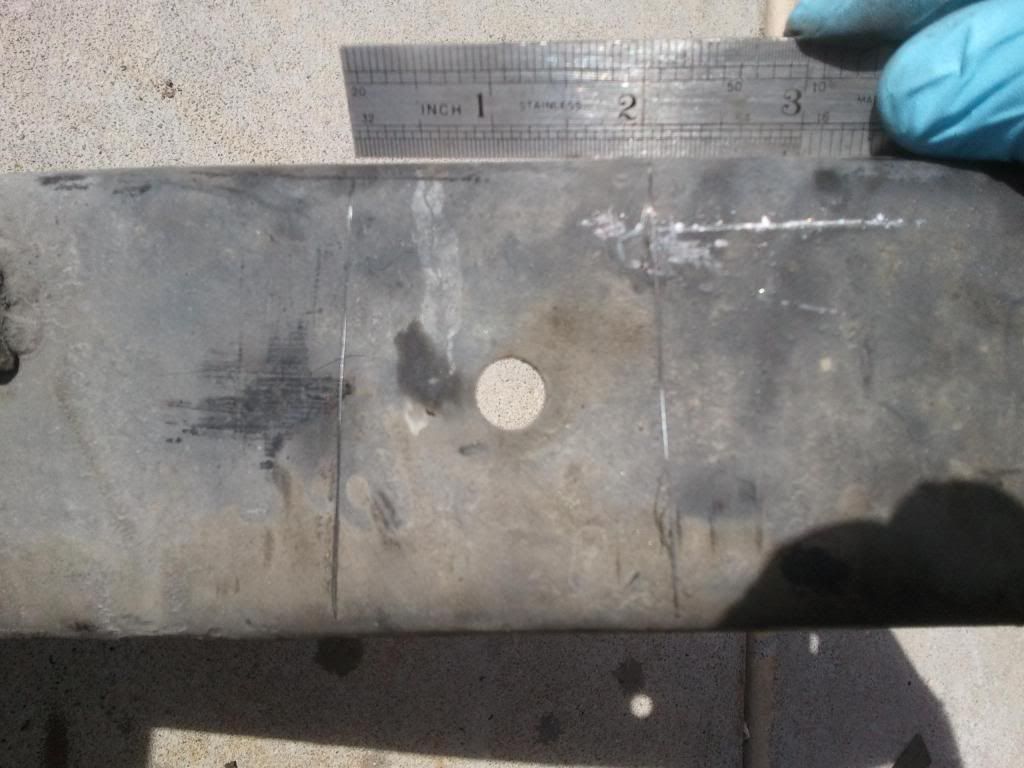
Second mark is made. 2 inches(51mm) between the two lines at the top.
posted image

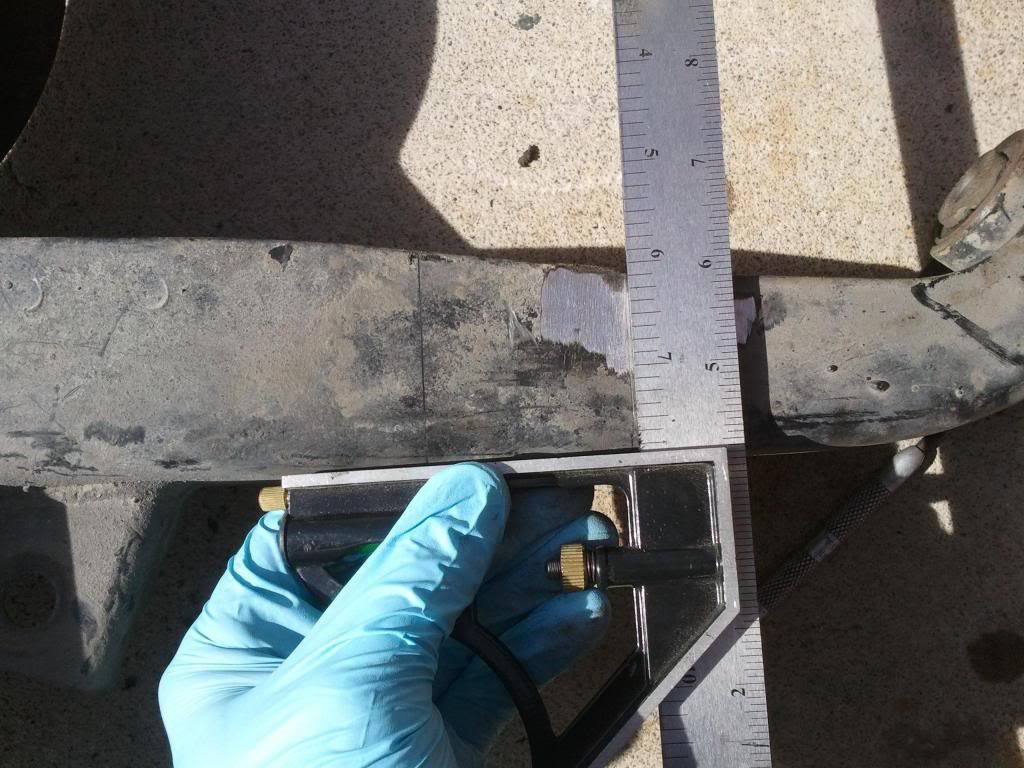
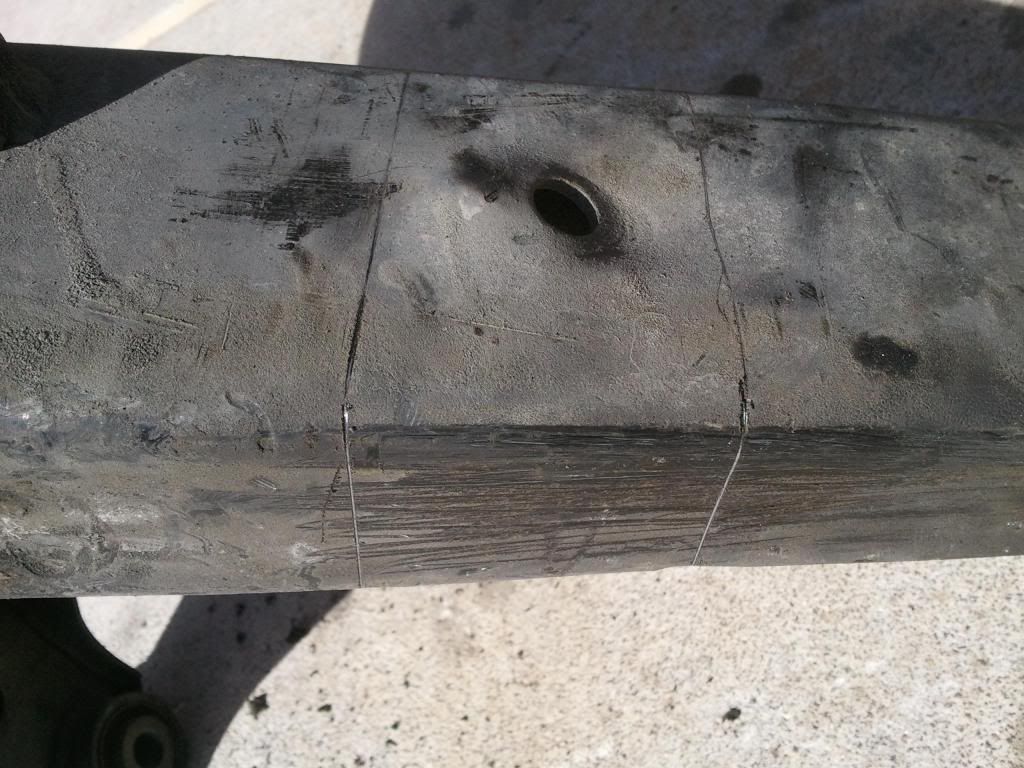
Continue the lines on the top and bottom surfaces of the control arm. Make them 90 degrees from the front face of the control arm.
posted image
posted image

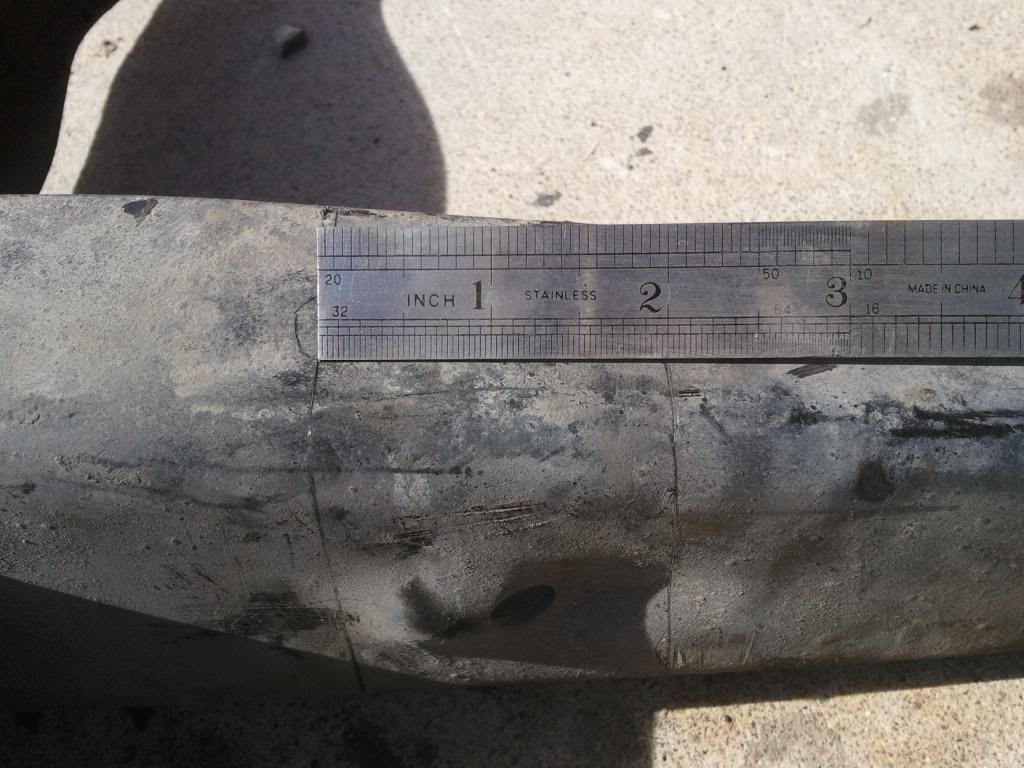
Double check there is 2 inches(51mm) between the lines on the top surface of the control arm.
posted image

The lines can be made anywhere from 90 to 93 degrees. The greater angle will create more camber correction before adjusting. A typical lowered S12/Z31 will be ok with 90 degrees. For extreme lowering AND zero or near zero camber angle 93 degrees is required. WARNING: Too much correction angle may result in difficult control arm installation and may cause control arm bushings to bind. Polyurethane bushings are recommended.

Layout both arms this way and make your cuts on the lines.
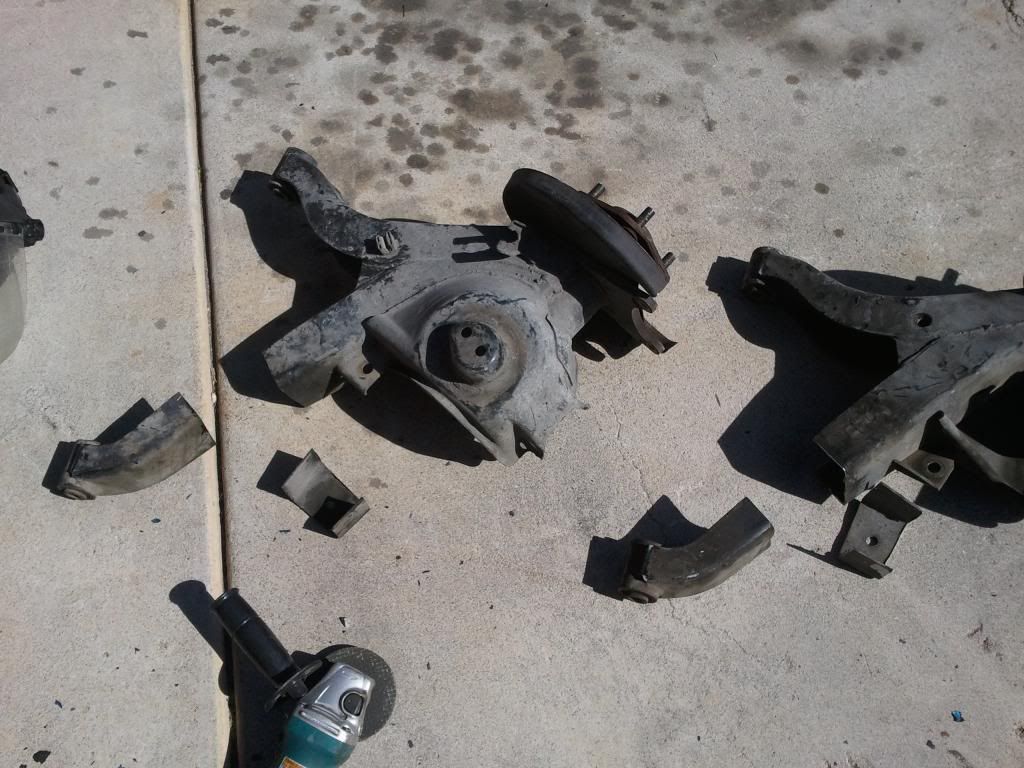
posted image

Flatten the indentation left on the small end of the control arm. Pictured is flattened on left and not flattened on right. Easiest method to flatten it is to place it on a solid surface like a metal bench top or concrete floor. Then strike the indentation downward with a large hammer.
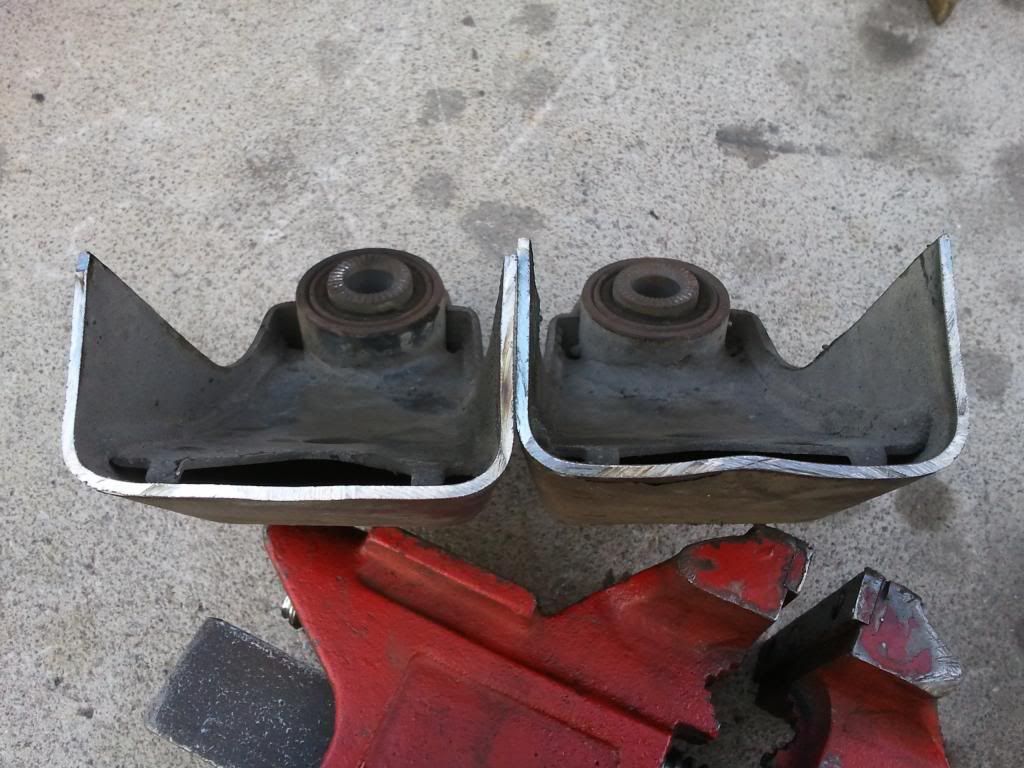
posted image

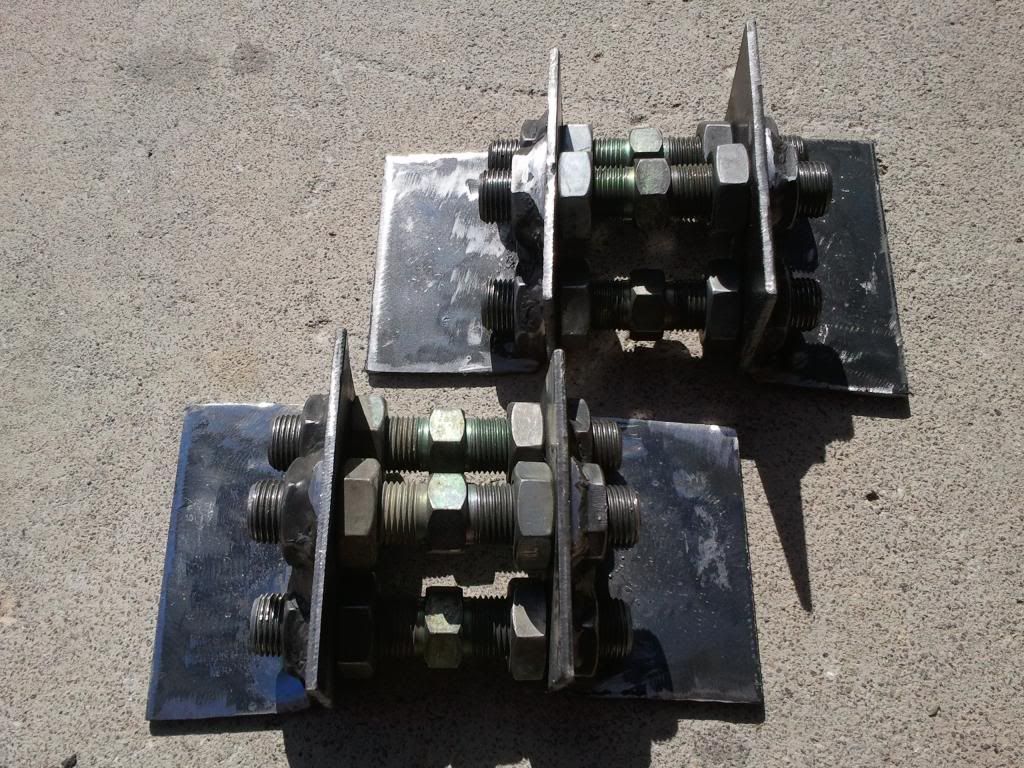
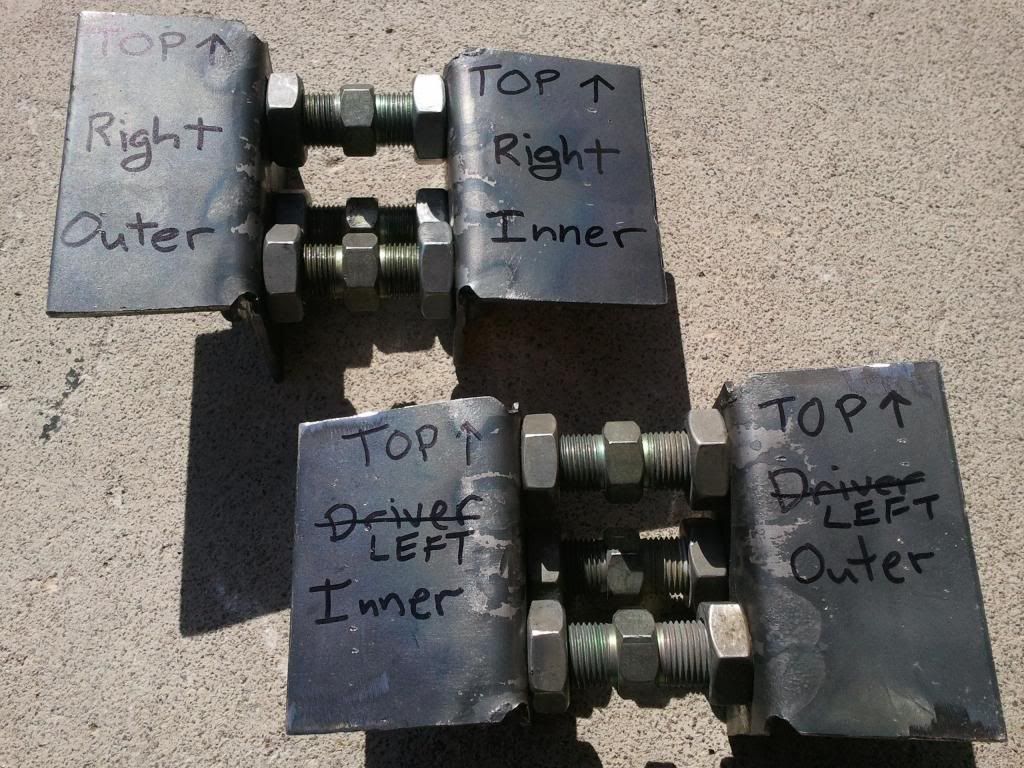
Adjustment brackets
posted image
posted image

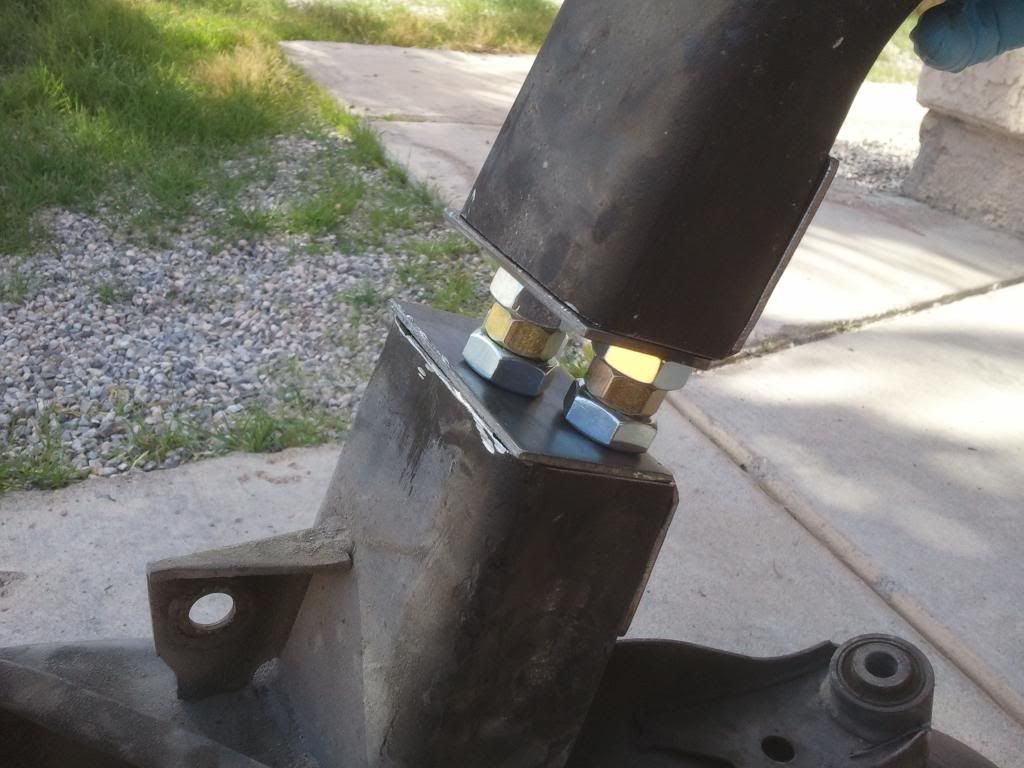
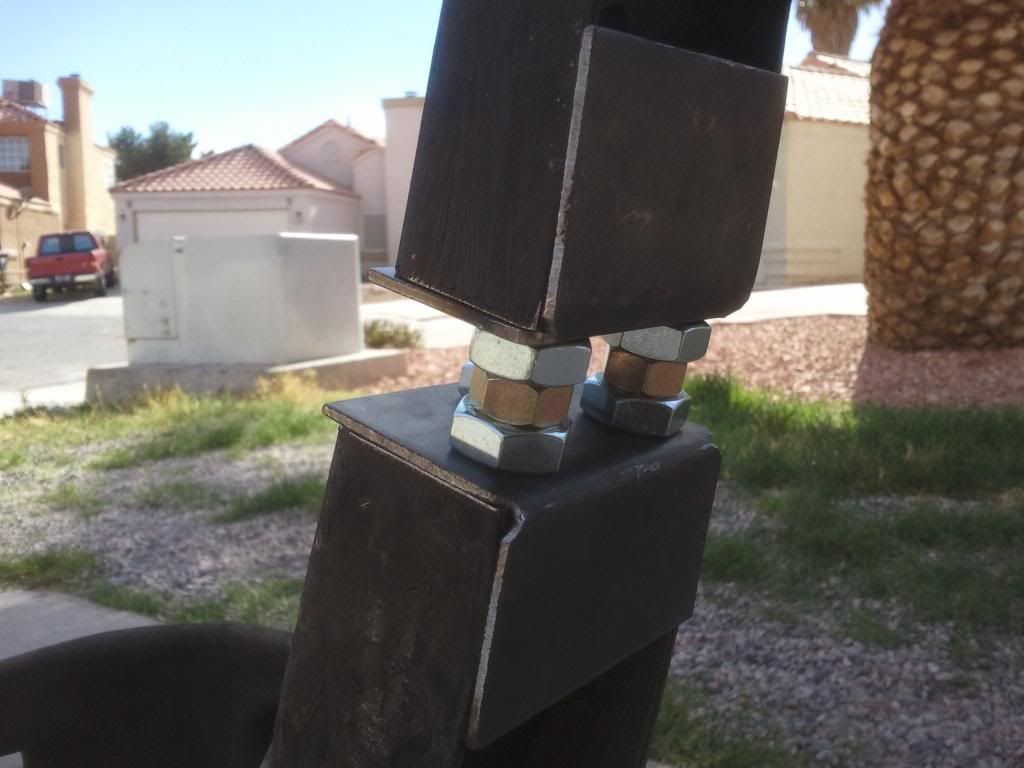
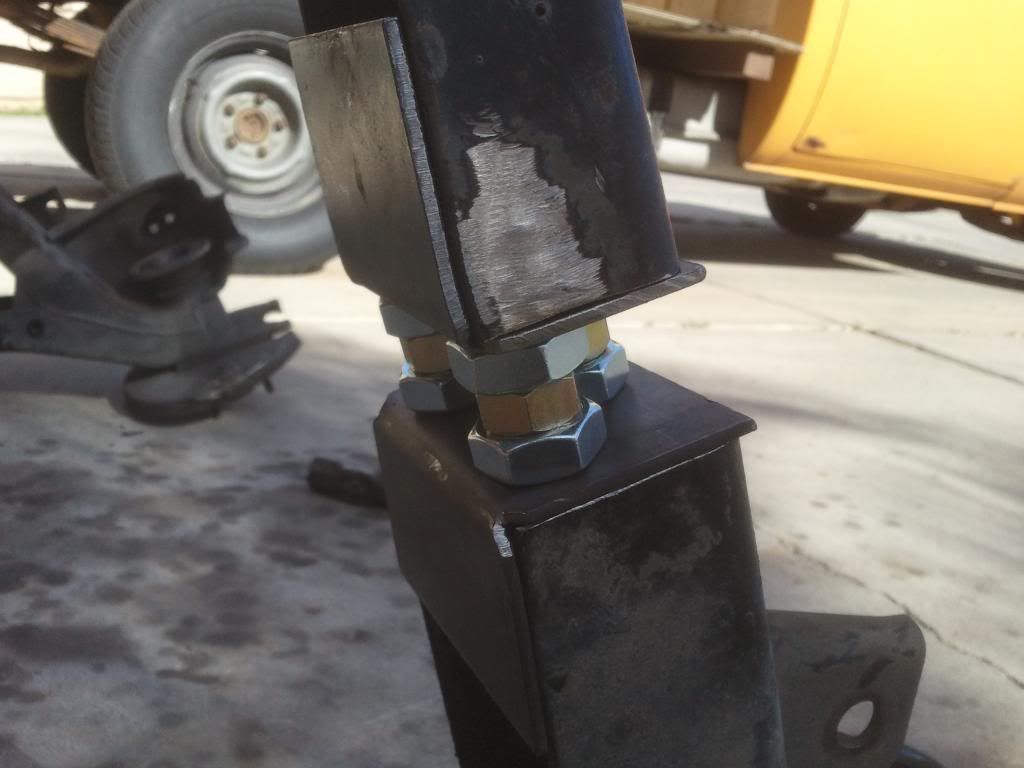
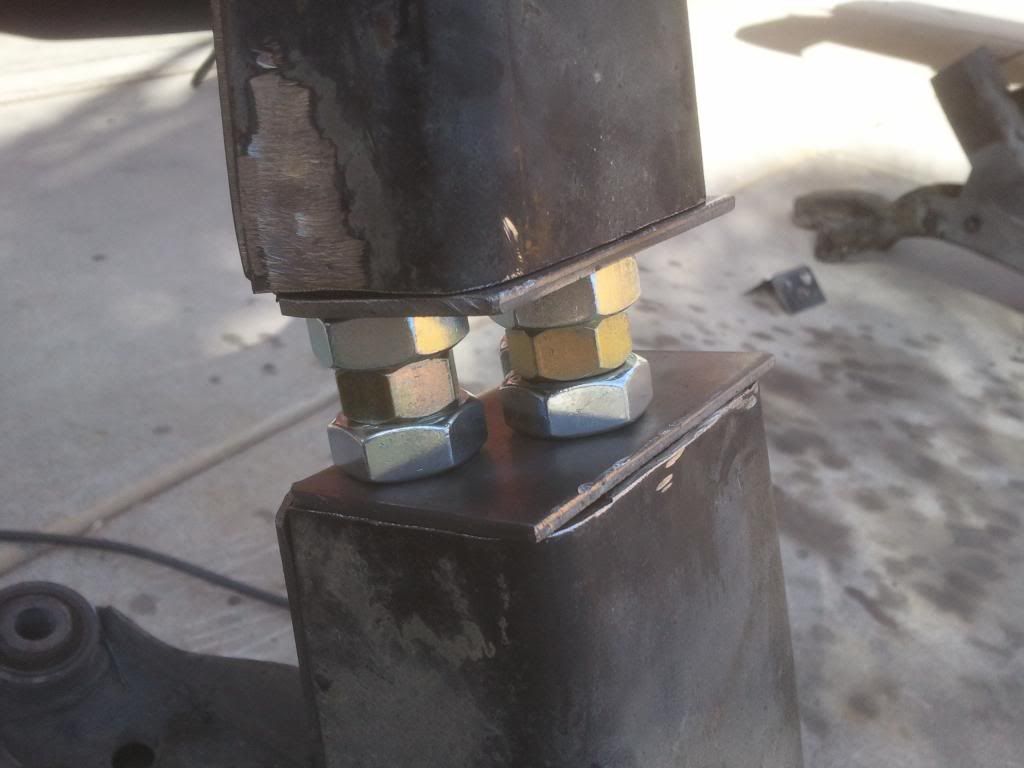
Brackets test fitted to control arms.
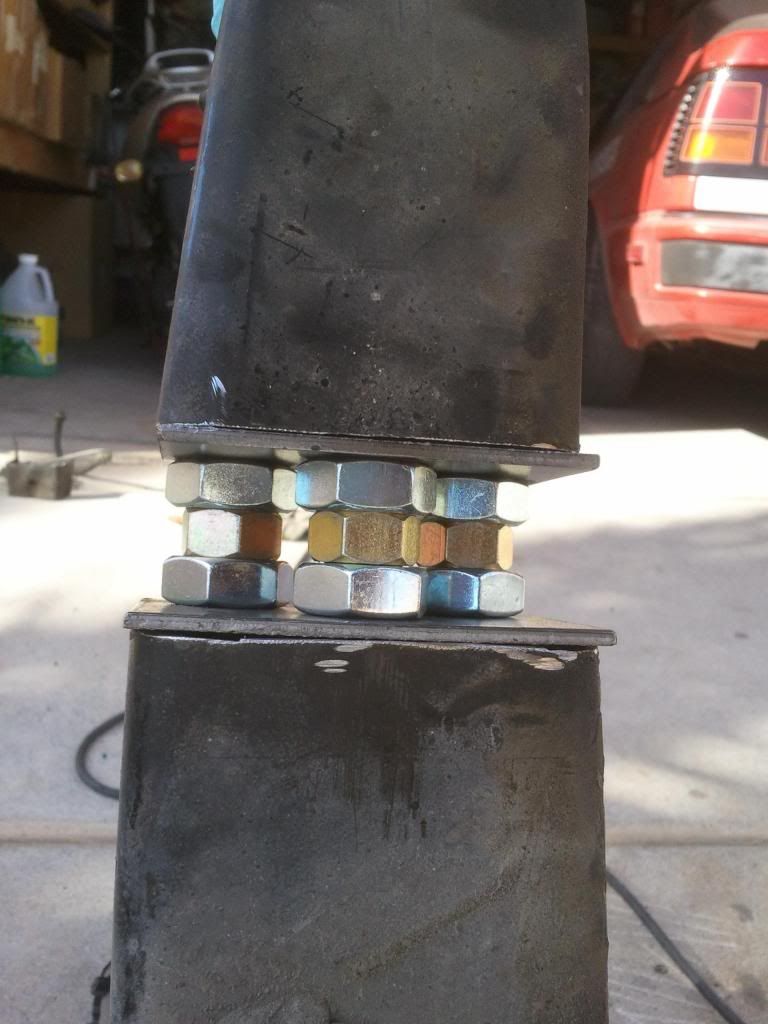
posted image
posted image
posted image
posted image
posted image

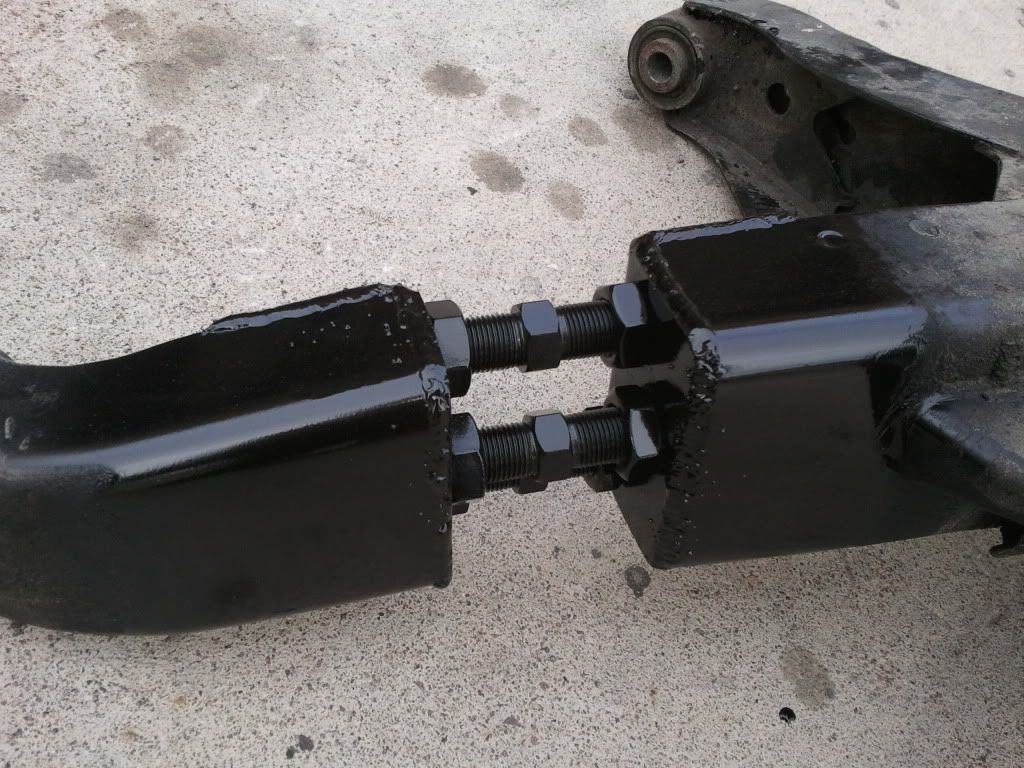
Weld the brackets into the control arms out of the car and not bolted to the subframe.

Finished result
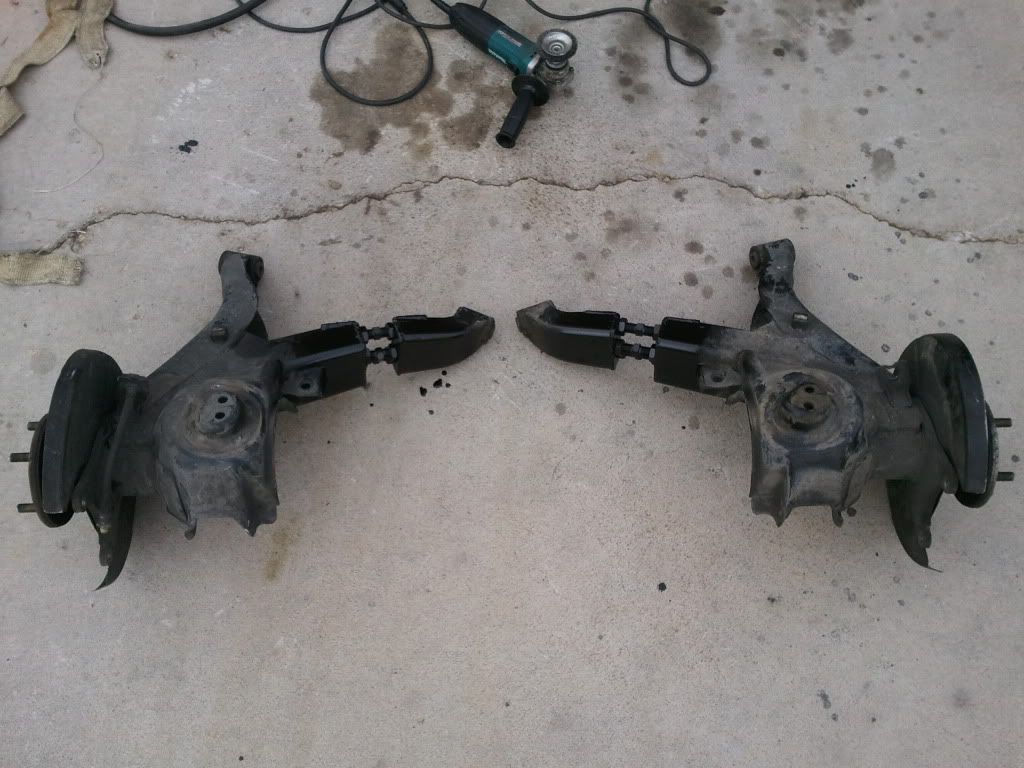
posted image
posted image
posted image

Installing the arms onto the car may require adjusting the brackets for length and angle until they fit. It may still be difficult to align the contol arm bolts. A rubber mallet, pry bar, and persistence may be required.

Reinstall brake lines, rotors, calipers, and axles. You are done.

Alignment Guide: http://club-s12.org/retro4/index.php?topic=37458.0

Silhouette Autosports adjustable rear control arm sale thread: http://club-s12.org/retro4/index.php?topic=37358

Be sure to like Silhouette Autosports on Facebook. https://www.facebook.com/SilhouetteAutosports
posted image
posted image

rednucleusFeb 26, 2014, 10:29 am · #2

An excellent write up with great pics - nicely done. I have never done any fab work but am curious - why not have the bracket wrap around both sides for more strength or would that just be way more than needed?
Mods - sticky this one ASAP!!

IggyEGuanaFeb 26, 2014, 12:13 pm · #3

Thanks!

The prototype control arms on my car have been abused pretty hard and they're a little weaker in design and the welds arent as good. No signs of cracks anywhere. I'm confident it'll hold up to anything but thats a good idea for added strength. It might be overkill but I just sketched it up and I'm keeping it in mind.

sideways_s12Feb 26, 2014, 9:00 pm · #4

It is stickied...

IggyEGuanaMar 1, 2014, 2:03 am · #5

Thank you!!!

sideways_s12Mar 1, 2014, 11:01 pm · #6

NP!

rednucleusMar 2, 2014, 1:44 pm · #7

Iggy, for a strictly d.d. stock S12, do you think this mod would make the car more stable on ice/snow, and decrease rear tire wear?

IggyEGuanaMar 3, 2014, 12:39 am · #8

If your car isnt lowered then you might be able to get the camber back to reasonable with just bushings. I'm not sure tho. Ive never had a stock S12 that stayed that way long enough to find that kind of stuff out. I would first get your alignment checked. Disregard the factory rear toe spec of -0.10 degree. They spec'd it that way as a compromise to account for squat. You want as close to zero rear toe as possible and err on the side of positive. Like 0.05 degree total rear toe in.  You will still see camber wear though because of squat. You can lessen it with poly bushings. Poly arm bushings, poly subframe bushings and raise the subframe as close to the body as possible, and an offset diff mount. A poly diff mount that raises the diff as much as possible. All those things will help correct geometry and reduce squat. You will have more noise coming from the rear end tho. Not perfect DD solution.

If you're lowered then this mod in addition to all the bushings would be the way to go. Just take precaution against rust on the modded areas especially the threaded adjusters. Annual heavy greasing or spray silicone lube should be enough.
Post Merge


rednucleus on 01:44:29 PM / 02-Mar-14do you think this mod would make the car more stable on ice/snow
yes because you can maximize your contact patch
pakii-afaMar 9, 2014, 1:47 am · #9

i thought only z31 turbo arms are 10mm wider? or is it all 87 - 88 z31s?

G-EMar 10, 2014, 8:24 pm · #10

All 87+ z31 arms... they all use the vented rotors too

IggyEGuanaJul 27, 2014, 10:14 pm · #11

Added in the link for the alignment guide. Forgot to do it sooner sorry.

Here it is as well: http://club-s12.org/retro4/index.php?topic=37458.0

sideways_s12Jul 27, 2014, 10:37 pm · #12

Do you have any of these premade? or are they made to order? Also maybe you can answer this since it's your old rearend *pause* at slow turns I get this like u turns and going from reverse to forward I get this shift from side to side it feels like not a huge shift but it's noticeable. What could that be?

IggyEGuanaJul 28, 2014, 2:24 am · #13

none pre-made. Thats probably your subframe bushings where it connects to the car

sideways_s12Jul 28, 2014, 3:45 am · #14

Ahh ok that makes sense How hard are those to swap out ?

IggyEGuanaJul 28, 2014, 11:28 am · #15

removing the old sleeve from the subframe is kind of a pain. I think I cut it most of the way through with my dremel and then used a screwdriver and hammer to chisel and pry it out.

BasicJul 28, 2014, 9:32 pm · #16

When I replaced my subframe bushings I used a sawzall to carefully cut through the sleeve in two places. After that a quick hit with hammer and chisel it came right out. it is a PITA though.

You may also check your diff mount bushing, it's way easier to replace than subframe bushes.

pakii-afaJul 29, 2014, 9:51 pm · #17

i replace the subframe bushing using 2 methods depending on how much my neighboors hate me that day. if they dont hate as much, i just light them on fire with a torch and burn them out then wire wheel the remains away. but if theyre being royal dirtbags, i use dry ice so it hardens, becomes brittle and cracks. while its cold just cut them out, feels like youre cutting composite decking this way but works pretty well.

sideways_s12Aug 1, 2014, 3:42 pm · #18

I.may have to look into that....