Heres a basic photo guide of how to make alignment changes with Silhouette Autosports adjustable rear control arms.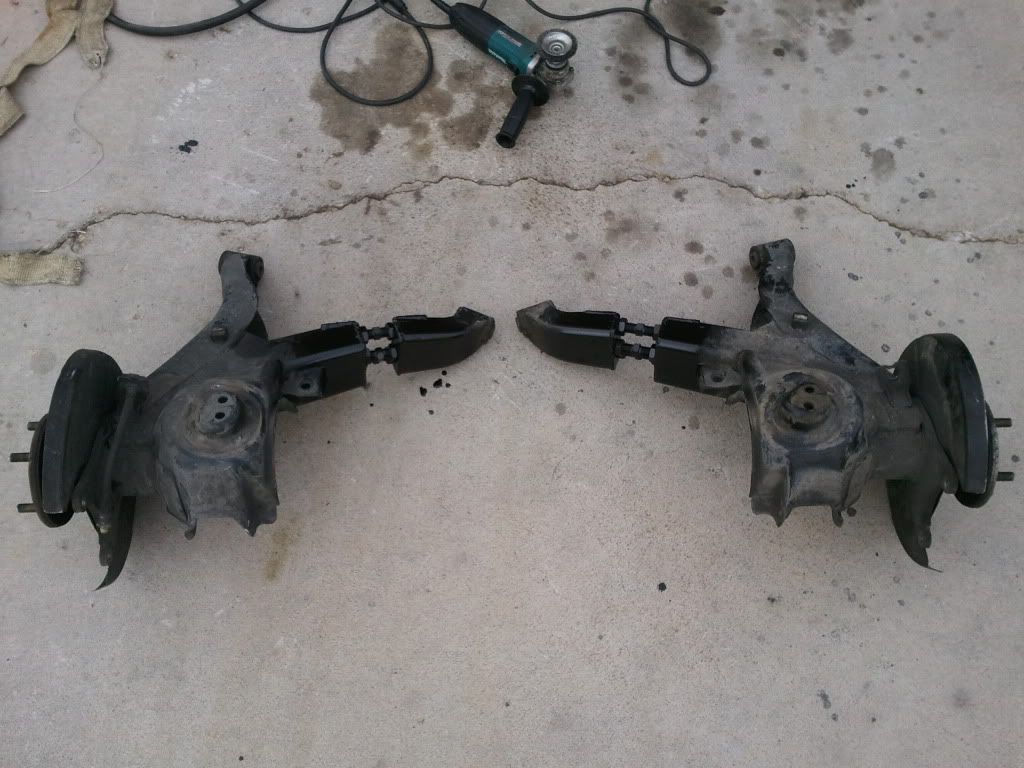
A basic explanation of how they work
The threaded adjusters are left-hand thread on one end and right-hand thread on the other. Turning them either lengthens or shortens the gap in the control arm bracket. Because there are 3 of them we can adjust them independently and "bend" the control arm. The factory toe adjustment is still used to dial in toe precisely after camber is adjusted and toe is close. You should turn each adjuster a little at a time so they move together and avoide premature binding. Camber adjustment is maxed out when the adjusters bind and can't be turned anymore using reasonable force. DO NOT USE EXTRA LENGTHS OF PIPE, ETC TO GAIN MORE LEVERAGE ON THE WRENCH!! DAMAGE TO THE THREADS MAY OCCUR!!!
The upper two adjusters are lengthened to reduce camber and move toe in.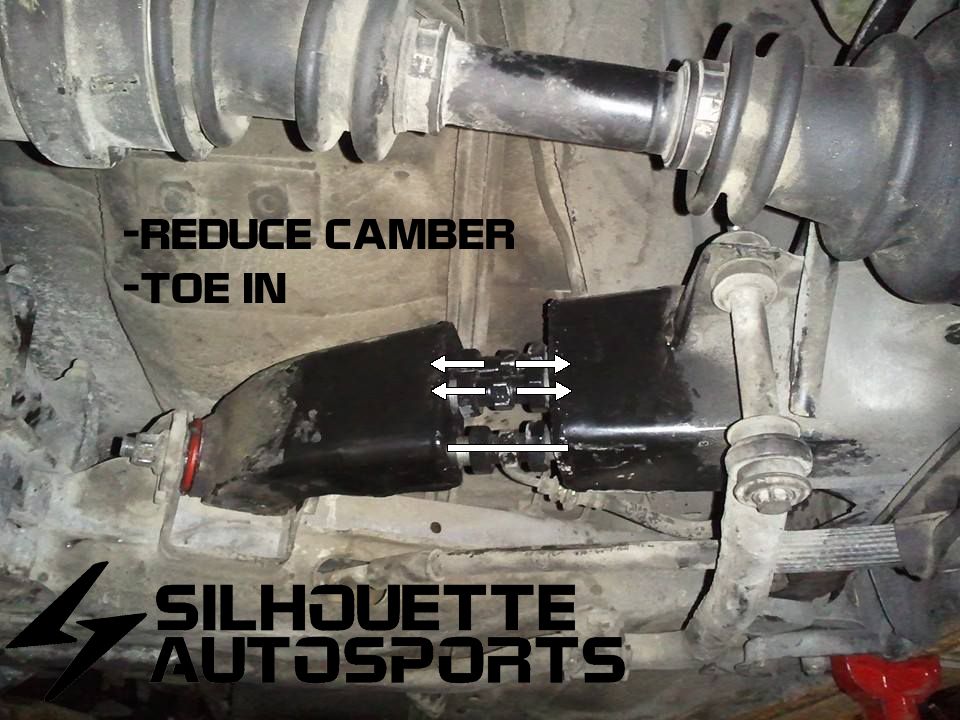
The lower two adjusters are shortened to reduce camber and move toe out.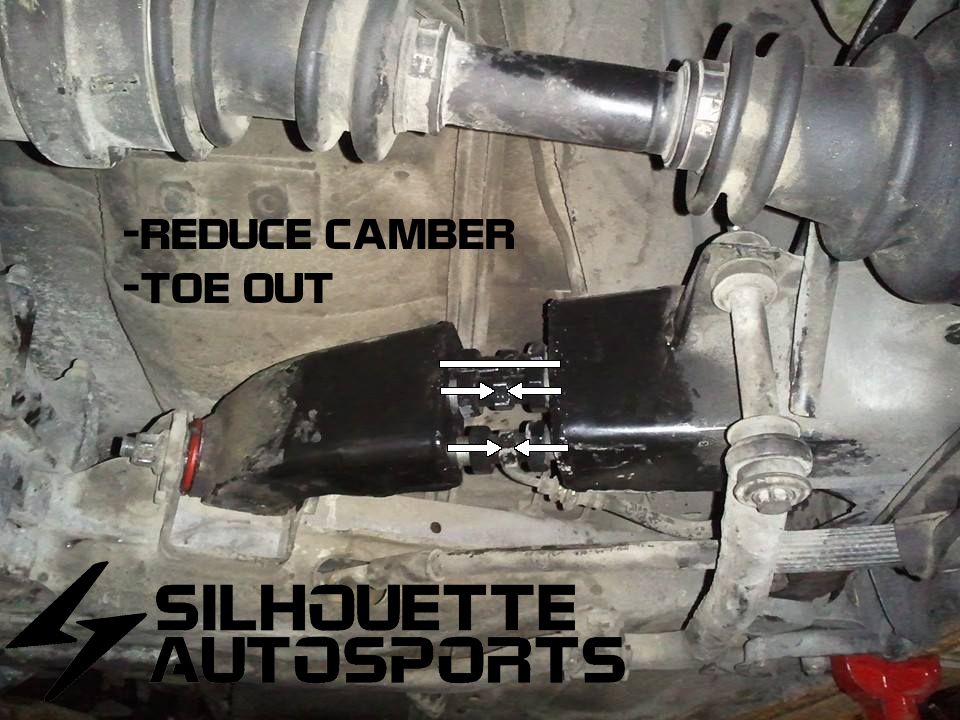
The upper two adjusters are shortened to increase camber and move toe out.
The lower two adjusters are lengthened to increase camber and move toe in.
All three adjusters are lengthened together to only move toe in.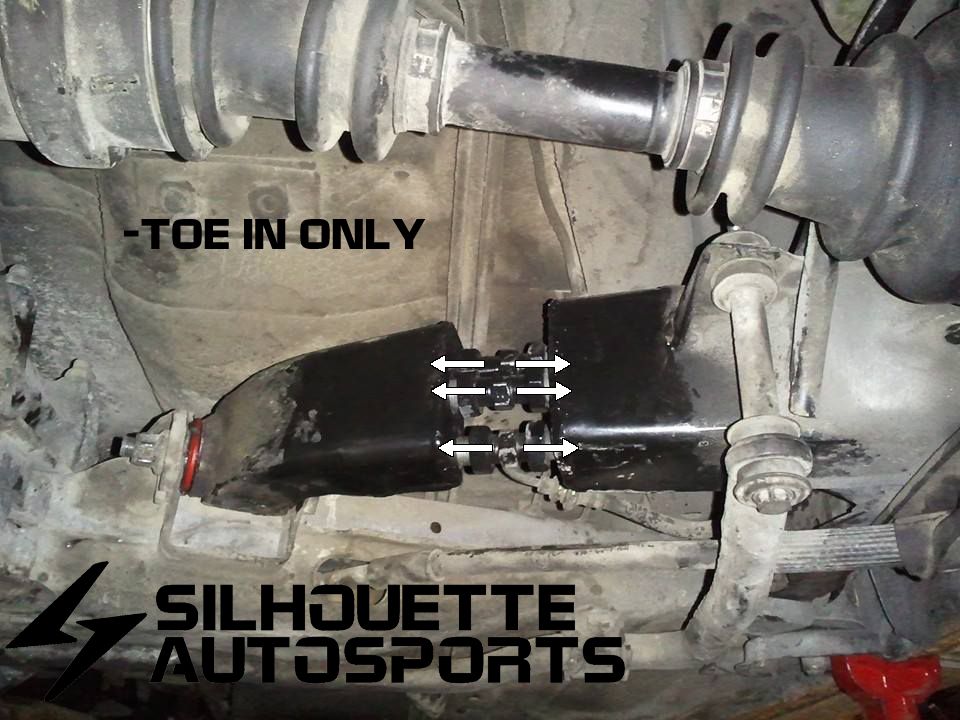
All three adjusters are shortened together to only move toe out.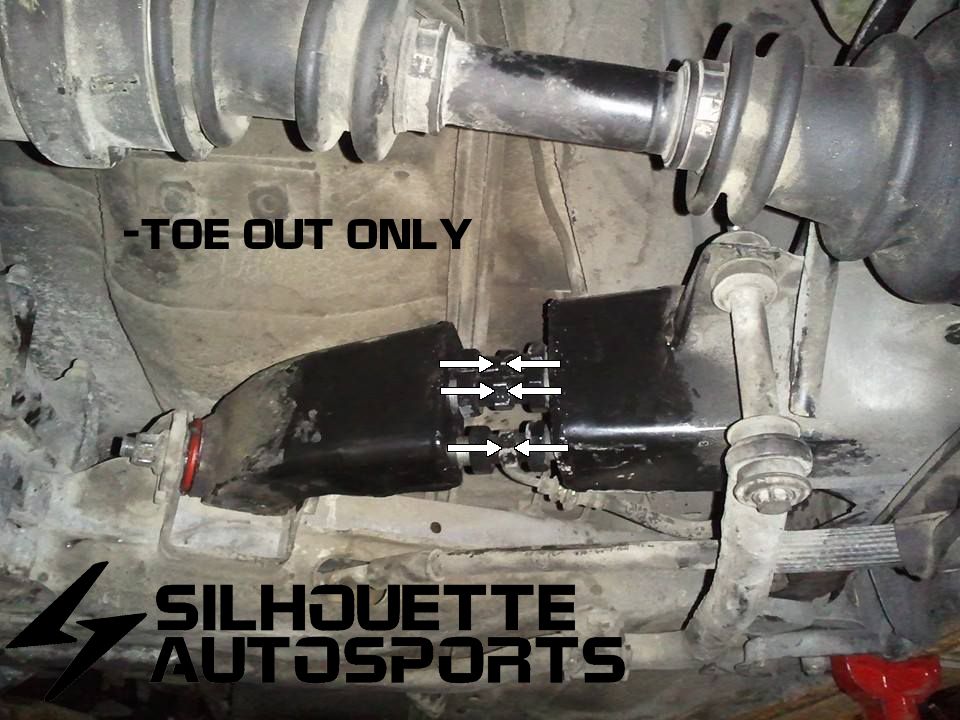
Feel free to ask questions and share your experience adjusting your brackets.
May 10, 2014, 10:31 pm · #1